Quick Homemade Apple Tart: Impress with Simple Steps
Imagine presenting a dessert that looks like it just came from a high-end French patisserie, yet took minimal effort to create in your own kitchen. Sounds like a dream, right? Not anymore! This article will guide you through mastering a simple apple tart recipe that promises stunning results without the fuss and intimidation often associated with baking. It’s the perfect solution for anyone craving a sophisticated treat that’s genuinely easy to make and universally adored.
Whether you're hosting a dinner party, preparing for a holiday gathering, or simply want to indulge in a delicious homemade dessert, this apple tart is your secret weapon. Its rustic elegance and warm, comforting flavors make it an instant crowd-pleaser. Forget complex techniques or endless hours in the kitchen – our approach focuses on straightforward steps and readily available ingredients to deliver a dessert that's both beautiful and unbelievably tasty.
Why This Is Your Go-To Simple Apple Tart Recipe
Many home bakers find the idea of making a fruit tart daunting, especially when compared to a traditional apple pie with its elaborate crimping and double crust. This simple apple tart recipe, however, strips away all that complexity while retaining all the charm and flavor. It's often hailed as being No-Fuss Apple Tart: Easier Than Pie, Just as Stunning, and for good reason!
The beauty of this tart lies in its simplicity. You don't need a special tart pan; a regular baking sheet will do. There's no fancy lattice work or intricate crimping required for the crust. Instead, you'll achieve a beautiful, rustic look by simply folding the edges of your pastry over the apple filling. This effortless technique creates a charming, homemade aesthetic that’s incredibly appealing. It’s a dessert that’s easy on the baker and loved by all who taste it, making it ideal for everything from casual weeknight treats to impressive holiday spreads like Thanksgiving.
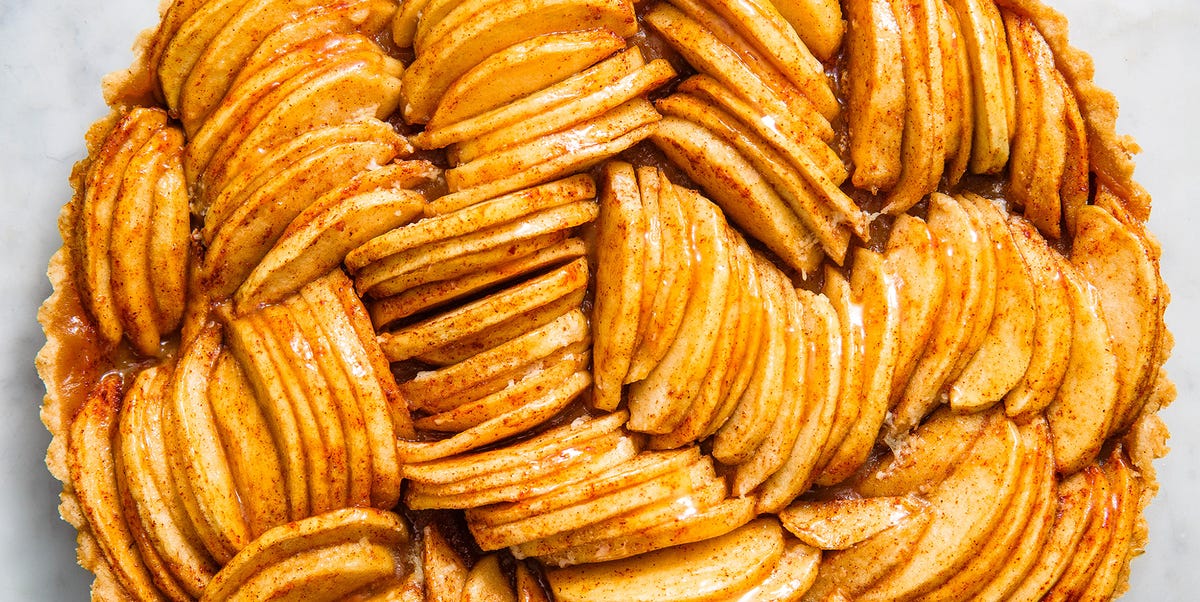
Beyond its ease, this tart consistently delivers on flavor and presentation. The thinly sliced apples, often unpeeled for extra rustic appeal and nutrients, are arranged artfully on a buttery, flaky crust. Once baked, a simple jam glaze adds a professional-looking shine and an extra layer of sweetness, while a sprinkle of toasted nuts introduces a delightful textural contrast. The result is a dessert that looks and tastes far more complex than the effort involved, making you feel like a master baker every time.
Crafting Your Perfect Apple Tart: Ingredients & Prep
The foundation of any great tart lies in its ingredients. For this simple apple tart recipe, quality matters, but accessibility is key. Here’s a breakdown of what you'll need and how to prepare it to ensure a fantastic outcome.
Choosing Your Crust: Puff Pastry vs. Pie Crust
One of the first decisions you'll make is about the crust. Both store-bought puff pastry and pre-made pie crust dough are excellent choices for convenience, dramatically cutting down prep time. However, each offers a slightly different texture and aesthetic:
- Store-Bought Pie Crust: This is a classic choice, providing a sturdy, buttery base that bakes up golden and flaky. It's easy to roll out (or unroll, if pre-formed) and work with, creating that traditional "pie-like" texture.
- Puff Pastry: For an extra layer of flakiness and a lighter, airier texture, puff pastry is a fantastic alternative. It bakes up with beautiful layers, adding an elegant, delicate crunch. When using puff pastry, ensure it's properly thawed but still cold enough to handle.
- Homemade Crust: If you have a go-to pie dough recipe and the time, a homemade crust will always elevate the tart with its unparalleled freshness and flavor.
No matter which you choose, the goal is a buttery, flaky foundation that complements the apples beautifully.
Selecting the Best Apples for Your Tart
The type of apple you use can significantly impact your tart's flavor and texture. For a balanced tart, aim for firm apples that hold their shape well during baking and offer a good mix of sweetness and tartness. Some top recommendations include:
- Granny Smith: Provides a pleasant tartness that cuts through the sweetness of the sugar and butter.
- Honeycrisp: Offers a delightful balance of sweet and tart with a crisp texture.
- Pink Lady: Known for its sweet-tart flavor and firm flesh.
- Jonagold: A sweet-tart apple with a crisp texture, ideal for baking.
- Golden Delicious: A sweeter, softer apple that becomes wonderfully tender when baked.
Pro Tip: Consider using a mix of two or three varieties to achieve a more complex flavor profile in your tart. Also, don't peel the apples if you prefer a rustic look and want to retain extra fiber and nutrients – just make sure to wash them thoroughly!
Essential Flavor Boosters & Pre-Bake Prep
Before the apples even hit the crust, a few simple additions can dramatically enhance their flavor and prevent common baking woes:
- Lemon or Orange Juice: Tossing your thinly sliced apples with a splash of fresh lemon juice (or orange juice, a lovely substitute that offers a slightly sweeter aroma) serves two purposes: it prevents the apples from browning too quickly and adds a bright, tangy note that perfectly balances the sweetness.
- Sugar and Butter: Before baking, generously sprinkle sugar over the arranged apples and dot them with small cubes of cold butter. As the tart bakes, the sugar will caramelize, and the butter will melt, creating a rich, luscious sauce that coats the apples.
- Spices: While optional, a pinch of cinnamon is a classic pairing with apples. For a deeper, warmer flavor, you might also consider adding a touch of nutmeg, cloves, or a pre-mixed apple pie spice blend.
Step-by-Step Assembly for Your Simple Apple Tart
Assembling this tart is where the magic of simplicity truly shines. Follow these steps for an impressive Easy Apple Tart Recipe: Bakery-Quality Dessert at Home:
- Prepare Your Crust: On a lightly floured surface or directly on parchment paper, roll out your pie crust or puff pastry into a rough circle (about 12-14 inches in diameter). If using puff pastry, unfold it carefully. Transfer the crust with the parchment paper to a baking sheet.
- Slice the Apples: Wash, core, and thinly slice your chosen apples (about 1/8 inch thick). The thinner and more uniform the slices, the better they will cook and present. Toss them gently with lemon or orange juice.
- Arrange the Apples: Starting from the outer edge and working inwards, arrange the apple slices in concentric circles, slightly overlapping each other, on the prepared crust. Leave a 1.5 to 2-inch border around the edge of the dough.
- Fold the Edges: Gently fold the bare edges of the pastry over the outermost layer of apples, creating a rustic border. This doesn't need to be perfect – the more natural, the better!
- Sweeten and Enrich: Sprinkle the arranged apples with your desired amount of sugar (adjusting for the sweetness of your apples). Dot the top of the apples with small cubes of cold butter. For an extra golden crust, you can brush the folded pastry edges with an egg wash (one egg whisked with a tablespoon of water).
The Finishing Touches: From Oven to Table
Once your tart is assembled, it's time for the oven to work its magic. But the journey to perfection doesn't end there – a few post-bake steps will truly elevate your simple apple tart recipe to bakery-quality status.
Baking to Golden Perfection
Preheat your oven to the recommended temperature (usually around 400°F or 200°C). Bake the tart until the crust is beautifully golden brown, and the apples are tender and slightly caramelized, with juices bubbling up. This typically takes 30-45 minutes, depending on your oven and the thickness of your apples. Keep an eye on it to prevent over-browning of the crust; if it browns too quickly, you can loosely tent it with foil.
The Secret to a Shiny Finish: The Jam Glaze
Immediately after removing the tart from the oven, while it's still warm, brush the apples with a thin layer of jam. This step is crucial for achieving that professional, glossy shine and adding an extra burst of fruit flavor. Excellent choices for the glaze include:
- Apricot Jam: A classic choice, providing a beautiful shine and delicate fruity sweetness.
- Orange Marmalade: Adds a citrusy tang that complements apples wonderfully.
- Fig Jam: Offers a deeper, more complex sweetness.
- Apple Butter: While delicious, note that apple butter will yield a less shiny, more opaque finish.
Warm the jam slightly in a microwave or small saucepan to make it easier to brush evenly over the tart.
Garnish for Grandeur
To further enhance your tart's appearance and add textural contrast, consider a final garnish. Toasted sliced almonds are a popular choice, providing a delicate crunch and nutty flavor. You could also use toasted pecans or walnuts. A final drizzle of warm caramel sauce before serving can also take your tart to an even more indulgent level.
Serving Suggestions for Maximum Enjoyment
This easy apple tart is best served warm, allowing its flavors to truly shine. While it's utterly delicious on its own, pairing it with a scoop of good-quality vanilla bean ice cream or a dollop of freshly whipped cream creates an unforgettable dessert experience. For a slightly lighter touch, a spoonful of Greek yogurt can also be a delightful accompaniment. It's truly a versatile dessert, perfect for a cozy evening at home or as the centerpiece of a festive dessert table.
Troubleshooting & Pro Tips for a Flawless Tart
Even with a simple recipe, a few common challenges can arise. Here are some pro tips to ensure your apple tart turns out perfectly every time:
- Preventing a Soggy Bottom: If you're concerned about a soggy crust, especially with juicier apples, you can lightly blind bake your pie crust for about 10 minutes before adding the apples. Alternatively, ensure your apples are sliced thinly and don't create excessive moisture. A generous sprinkle of breadcrumbs or ground almonds on the base of the crust before adding apples can also absorb excess liquid.
- Achieving Evenly Cooked Apples: The key here is consistent, thin slicing. If some slices are thicker than others, they will cook unevenly. If your apples seem to be browning too much before softening, cover the tart loosely with aluminum foil during the last 10-15 minutes of baking.
- Crust Browning Too Fast: If the edges of your crust are browning too quickly, create a foil ring to shield them, allowing the center to continue baking.
- Making Ahead & Storing: While best served warm and fresh, you can bake the tart a few hours in advance and gently reheat it in a low oven (around 250°F or 120°C) for 10-15 minutes before serving. Leftovers can be stored at room temperature for a day or two, or in the refrigerator for up to 3-4 days.
Conclusion
Crafting a homemade apple tart doesn't have to be an intimidating endeavor. With this simple apple tart recipe, you have all the tools and tips to create a truly impressive, bakery-quality dessert right in your own kitchen. From selecting the perfect apples and choosing your preferred crust to applying those gorgeous finishing touches, each step is designed for ease and maximum impact. So go ahead, embrace the joy of baking, and prepare to delight yourself and your loved ones with a stunning, flavorful apple tart that truly speaks volumes about your culinary prowess – all with minimal effort. Happy baking!
